
This week I’ve been working on bolsters for my yoga space. I’m part of an online sewing group that is more of a fabric hoarders support group that encourages each other to use stash fabric and notions, rather than feeding the beast.
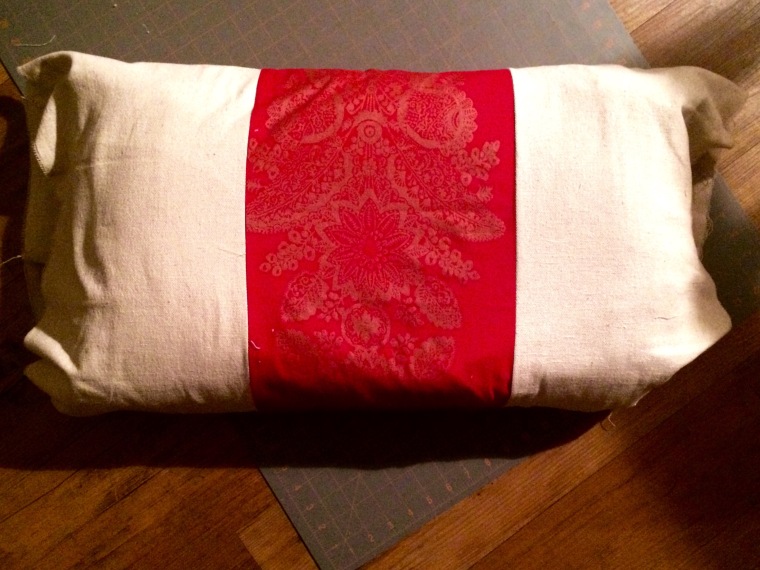
This month we are having a challenge and there were a few gems categories included using any or all of the following: something red, fabric I dislike the most, largest piece over 4 yes and in stash the longest. When I received my first machine, I bought some Marimekko fabric at the Crate & Barrel outlet store to make curtains in our guest bathroom. Naturally, I bought too much and the leftovers have been hanging out in my stash without any future ambitions, like loafing houseguests. I found them again when I went looking to see what I had that would qualify for this month’s challenge. It’s red! I’ve had it for almost 7 years and I think it’s ugly enough that I don’t want to see it anywhere else in my house.
The fabric is actually printed with a bronze motif that is perfect for my yoga studio. In addition to the red, there is a coordinating cream version with a two-toned bronze/taupe motif. There isn’t enough of it to make the entire bolster from it, but since the motif runs in columns, it is perfect to use as a panel with contrasting fabric for the sides. I have leftover canvas from my couch project that will make-do for the side panels. It’s called stash busting for a reason, so even though I’m sure the right compliment exists in fabricland, I need bolsters and I have fabric – use it!
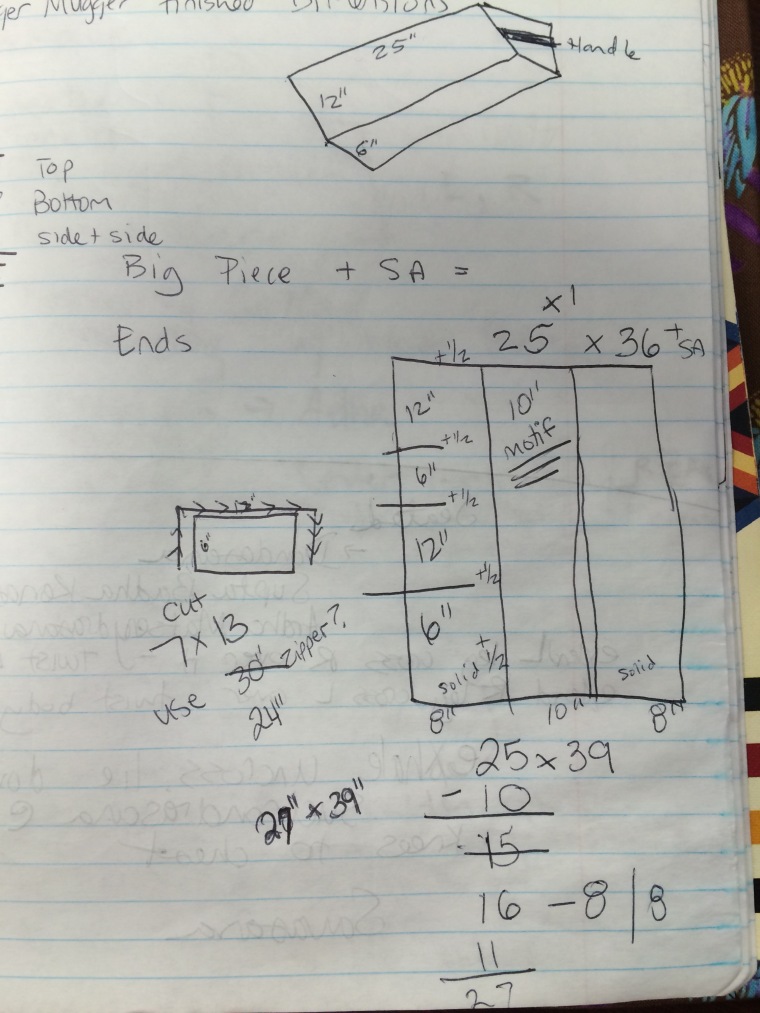
I searched for a few tutorials and pulled up the finished dimensions of a mass produced bolster that is common in big studios. I’m working towards the rectangular bolster with dimensions that come close to 12” deep x 6” tall x 25” wide. The tutorial I’ve referred to the most is from WarehouseFabricsInc.
I cut strips from the red Marimekko at 11” x 37” and then matching strips from the canvas. It will work up into six red and three cream bolsters. I’ve stitched the red ones into panels and I love how they look! I should move to cutting the side pieces and assembling the cases in assemble line manner, but I know I need zippers and stuffing.
The stuffing presents an obstacle. I don’t want to spend a ton on these, so I’ve turned to see what sources other tutorials use beyond regular batting as the main tutorial suggests. One of my favorite ideas is using old clothes and I thought I had a surplus of my husband’s old t-shirts. I stacked them up last night and found a way to keep them rectangular, but it is too heavy. The support also lags in the middle, so without some adjustments my first option falls flat. Not to mention, that to make the 6” stack took over half of the shirt collection and that method would only fill one bolster.
I’m considering rolling up some old jeans to make a more supportive center and then supplementing with T’s and stuffing.
Back to the drawing board on this one since support is the most important quality of a yoga bolster.
Does anyone have any stuffing hacks?
